Sunday, July 14, 2019

Creating a symbolic link on Ubuntu 18.04 for xampp htdocs

So I have been struggling to run code inside xampp htdocs on Ubuntu since I did not have the sudo privileges. As one may know, when you navigate to http://localhost in your browser you are being sent to the htdocs directory within XAMPP (specifically /opt/lampp/htdocs). This folder’s read and write permissions are limited to the root user and will not let you create files and folders within it.

I did a bit of Googling to find a resolution. To my luck, I found what is called a symbolic link, this is a special kind of file (entry) that points to the actual file or directory on a disk. Essentially this means that your projects will technically exist in this new folder which will reside in your Home folder, but XAMPP will treat it as if it were located within htdocs.

There are two types of links:
  • symbolic links, Refer to a symbolic path indicating the abstract location of another file
  • hard links, Refer to the specific location of physical data.
We will be using the symbolic link a.k.a soft link. My work generally resides in the Documents folder then I'd make subfolders. E.g.,  there is a folder for programming, a folder for University, a folder for Media and so on.

Creating a symbolic link

-s, make symbolic links instead of hard links
sudo -s <directory that must be linked> <directory that is linked to>
sudo -s <target file> <symbolic file>

Type in:
sudo ln -s /home/banele/Documents/programming/php/Projects/PHPExcelLibrary /opt/lampp/htdocs

Enter your password when prompted. This is all it takes to create the symbolic link. We use sudo because of the htdocs permissions. For most symbolic links you create in Ubuntu it is not necessary.

Extra bonus I also created a symbolic link for the php file for the system variables.
sudo ln -s /opt/lampp/bin/php /usr/bin/php

Removing a symbolic link

You can remove existing links attached to files or directories by the unlink or rm command.

  • unlink <system link name to remove> unlink /home/banele/Documents/programming/php/Projects/PHPExcelLibrary
  • rm <system link name to remove> rm /home/banele/Documents/programming/php/Projects/PHPExcelLibrary


Saturday, July 6, 2019

At last!! I installed Ubuntu 18.04.2 LTS (Bionic Beaver) on my MacBook Air

This blog is not about the step by step process of installing Ubuntu on a Mac it's basically for me to reference for future purposes. So, there are three main reasons why I ended up installing Ubuntu on my Mac.

  1. I've come to realise that I simply do not like Apple products period.
  2. I wanted to Install Ubuntu on it anyway
  3. Not a programmer-friendly machine
  4. The battery is dead, it lasts for about 45 minutes and it's very expensive to replace.

I've been contemplating doing this, simply because I was thinking of drivers compatibility and the difficulty of reverting back should it not work.

Basically, I need these three components:
  •  Ubuntu 18.04 LTS  - Download the .iso image. I prefer a Long Term Support(LTS) rather than normal releases, mainly because of stability, security patches, maintenance and support by Landscape, Canonical's enterprise-oriented server management toolset
  • UNetBootin - UNetbootin allows you to create bootable Live USB drives for Ubuntu and other Linux distributions without burning a CD.
  • USB drive, minimum 4GB

Things to install after installing Ubuntu


  1. Install Snap
    sudo apt install snapd

  2. Install media codecs using the Ubuntu Restricted Extra package.
    sudo apt install ubuntu-restricted-extras

  3. Prolong your battery and prevent overheating
    TLP is a wonderful tool that controls CPU temperature and extends your laptops’ battery life in the long run.
    sudo apt install tlp tlp-rdw
    sudo tlp start

  4. Install SimpleScreenRecorder
    sudo apt install simplescreenrecorder

  5. Install skype using latest .deb
    sudo apt install ./skypeforlinux-64.deb

  6. Install Flat Remix Gnome theme using the following PPA in Ubuntu and Linux Mint.
    sudo add-apt-repository ppa:daniruiz/flat-remix
    sudo apt-get update
    sudo apt-get install flat-remix-gnome

  7. Install Pop theme using the following PPA in Ubuntu and Linux Mint.
    sudo add-apt-repository ppa:system76/pop
    sudo apt update
    sudo apt install pop-theme

  8. To unlock the grayed out Shell icon theme option in Tweaks
    sudo apt install gnome-shell-extensions
    Enter your password, and then type “Y” to confirm when prompted.
    Log out, and then log back in after installing the extensions
    Launch the Tweaks application, click “Extensions” in the sidebar, and then enable the “User Themes” extension.

  9. Install Visual Studio Code (I will create a small blog with all of my favourite extensions and themes later)
    Download .deb file from https://code.visualstudio.com/download

  10. Installing IntelliJ and phpStorm from Snap
    sudo snap install intellij-idea-ultimate –classic
    sudo snap install phpstorm –classic

  11. Installing XAMPP
    sudo /opt/lampp/lampp start
    sudo /opt/lampp/lampp stop
    sym-linking the PHP library from file and refer to this php file path /usr/bin/php wherever required: sudo ln -s /opt/lampp/bin/php /usr/bin/php

  12. Installing JDK 12

  13. Install Slack
    sudo snap install slack --classic

Friday, January 25, 2019

Angular and my Internship

How I met Angular๐Ÿ‘ฝ


So this is kind of a rant in a way and also my view of what I think of Angular in general and lastly what I know about this framework.

Background
A bit of a background of how I came to even work with Angular. I was fortunate enough to get employment during my second year (2018) University December holiday. The holiday is basically three months, we generally finish at the beginning of November (exams and everything else including lectures) but the official University closing date is in December and open towards the end of January and the official commencement of lectures is at the beginning of February. So I was one of the three intern software developers. Boy was I excite๐Ÿ˜„๐Ÿ˜Ž!!


My project
Fast forwarding to the time we were assigned our projects as interns and knowing the stack we will be using. At this point, my excitement is overflowing. I got my project and I was working on Integrating Google JavaScript map API into an in-house software, some of the features I incorporated were marker clustering, Geolocation and a few others. The main part I implemented was the address search autocomplete functionality


The road got steeper
The real problems came. Firstly, I knew absolutely zilch about Angular nor did I know how everything works together in the system. Secondly, the code was waaaay above my mediocre level of programming. I think I read so much documentation than I have done in the past two years of University in a matter of two months. I must commend Google though, they have very clear and comprehensible documentation with clear code examples.

 Summary and lesson learnt
I haven't understood Angular but I understand the concept behind why there's components, modules and why would anybody choose Angular any project. Two things I can say I have learnt. One, understand your code and two, work on more projects to understand the framework

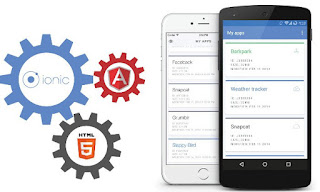
Ionic application

Ionic application


๐Ÿ˜ŽSo I am very excited, honestly I haven't been this excited about a project in a while. The corporate industry truly sucks the fun out of things, but anyway I am actually very much looking forward to this project.

Project background
This project I started it two years ago when I was doing my first year. It initially started as a university project and we were in a group. My main idea behind the project I wanted to do something that will truly be helpful or at least something that is used in real life situations hence I proposed to my team that we approach the CPUT HIV/AIDS Unit and see if we can create an application for them. Fortunately, they were in need of a mobile application that will help them to register and manage volunteer peer educators, set up events for the unit and many more features. I proposed the project again to a different group that I worked with in my second year but no one truly dedicated to it. I basically worked on the development alone until it was 80% done then they snuck in to try and "work" with me. Long story short they also ditched the project.

Project progress and Stack to be used
Three reasons as to why I am very excited about this project. One, I am working on a project that I truly love and I honestly want to see it through. Two, I will be using a cross-platform framework that I haven't used. I'm looking forward to the learning curve and I will be using stacks that I haven't exposed myself to, such as Angular, CSS, JavaScripts hosting(since I will also create a content management system (CMS) which is simply just a single page). Lastly, I actually want to work on it alone so that I can manage everything myself

So far I have this hideous native application that I have already created on Android Studio. The concept will remain the same however, I will have quite a few changes that I will apply. I have the project specification in place and designed the wireframes for me to reference.

What do I want to achieve
I want to see this project through because I truly believe in it. I started it and I intend on finishing it. That's it!!

What I wish for this project
I'm doing this project for free and I'll be working on it during my spare time and mostly during weekends. Bear in mind that I am a full-time student, working as a part-time intern and I have a company that my friend and I have started. I just wish I would truly make a difference to its end users. Hopefully, I will get some recognition and appreciation from that Institution๐Ÿ˜Ž

What am I going to learn
Based on the project and what I want to implement, I think I will learn the following, of which this is what makes it even more interesting for me.
  1. Ionic Framework(I'm killing four birds with one stone here, learning Angular, CSS, JS and RESTful APIs)
  2. Learning how to host a website
  3. Create a single page website (this will be done in Angular)
  4. Hosting
  5. Writing tests for the application


Monday, January 14, 2019

The Genesis

So I have been thinking of creating this sort of an online diary slash blog. Something that I will be able to access anytime, anyway and will be available online for me and most probably share with other people. It's basically going to be about everything I experience in my daily endeavours or thoughts that I may have, things I have learnt or even things that I feel I need to rant about in my Software Development.
I just love Programming man!!
๐Ÿ…ท๐Ÿ…”๐Ÿ…ก๐Ÿ…”  ๐Ÿ††๐Ÿ…”  ๐Ÿ…ถ๐Ÿ…พ❗❗❗

Good bye Windows, hello Ubuntu!

After years of using Microsoft Windows, from the days of Windows XP through to Windows 11 (though I'd be lying if I said I've actua...